Finished Project: Mum’s maternity top

I think I may be nearing the end of being able to make clothes at home for a while :-(. I have to cut the fabric out on the floor and it’s getting a little tricky to bend down without squashing the baby!

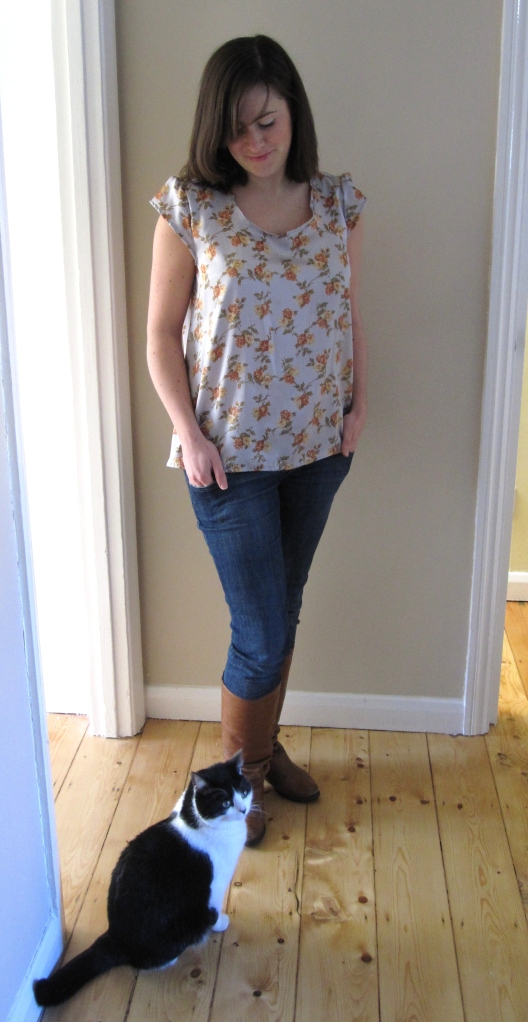
I will hopefully be able to enlist some (Dave) help to make at least one more thing I’d been planning, but for now I have just finished the 1980s maternity top using my mum’s pattern from when she was pregnant with me.

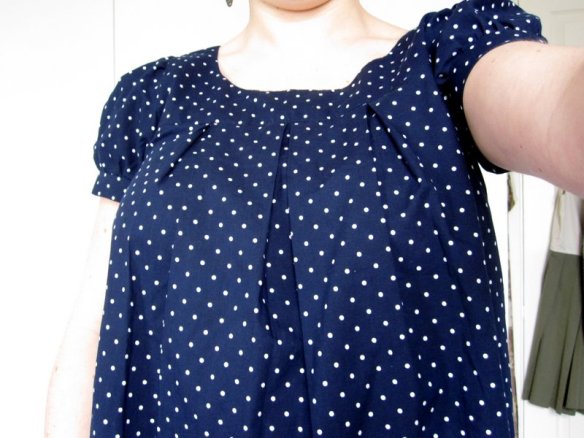
I made the middle top, with elements of each of the other dresses.

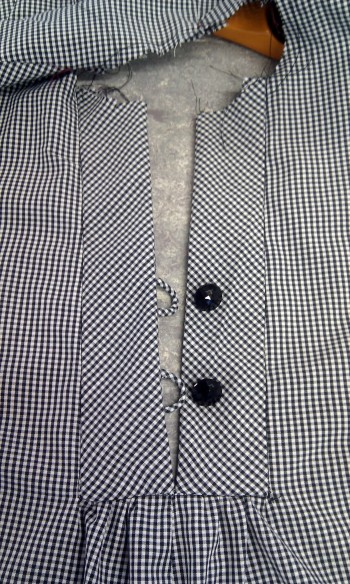
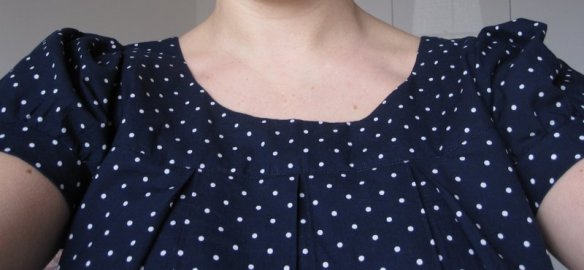
I was really pleased with everything I’d learnt and how well I’d been able to do it – from rouleau loops (see the tutorial I did here), to my first collar, to making the front buttony bit (not sure what that’s called!) neat on the outside and inside – you can’t see any seams or anything from inside!

Then I went to shorten the sleeves and realised I’d been a bit over zealous with the overlocker and got a bit of the left (right in the top photo) sleeve itself trapped in the seam, hence the horrible crease you can see in the photo! Thankfully it’s not as noticeable when on I don’t think, especially if I turn that arm away from the camera…!

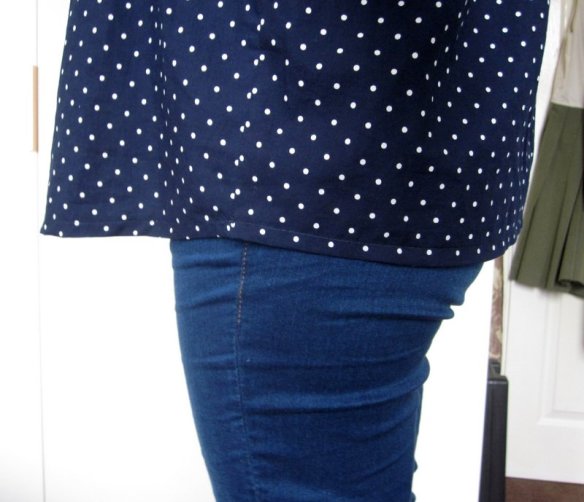
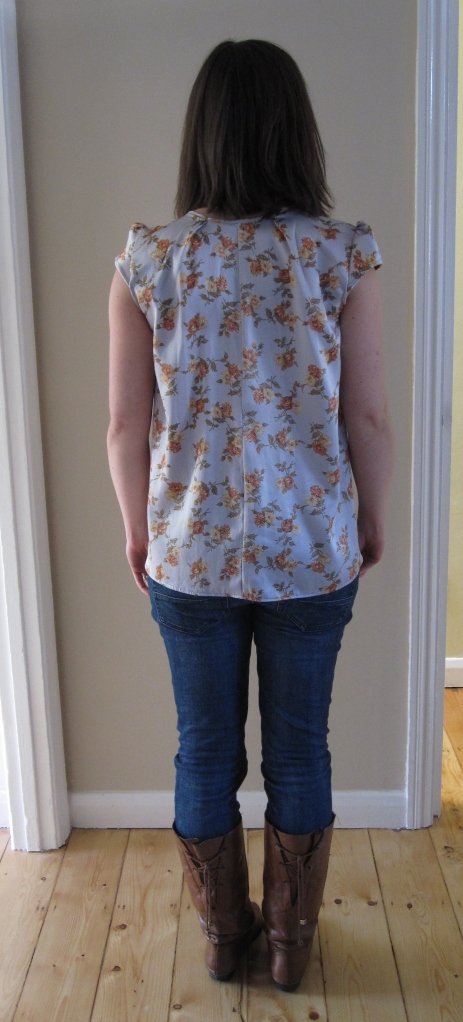
The style is obviously not meant to be figure hugging, but even so I took quite a bit of fabric out at the back seam to make it slightly more flattering – it is part baby and part fabric making it stick out that far!

While it’s not a top I would necessarily choose if I wasn’t pregnant, I learnt lots in its construction, and it’s nice to have used one of my mum’s patterns!

How to make rouleau loops (and what they are)

By the end of my Clothes Making class on Monday, I was feeling pree-tty pleased with myself. Why? Because I not only learnt what a rouleau loop is, but I also learnt how to make one.

So what is a rouleau loop?

It does not, as I spent much of my lesson hoping, have anything to do with a roulade except for the fact both words are to do with rolling in French.

Num, num, num...

Sadly, a rouleau loop is in no way edible.

Rouleau on it’s own is a decorative technique that involves creating patterns with piping, cording or bias tape.

A rouleau loop uses the same cord or piping, but as a way of fastening buttons. I guess we’re most familiar with them being used down the back of bridal gowns. No prizes for guessing whose dress came up most when I did a quick search!

As you may have seen from a previous post, I am currently making a top using a maternity pattern my mum had when she was pregnant with me.

I am making the middle top, but with short sleeves and two buttons down the front. It is these two buttons that require the rouleau loops, so here goes on how I did it!

(Apologies for poor photos, I forgot my camera so had to use my phone)

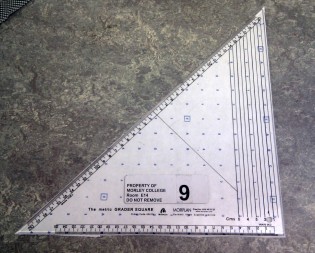
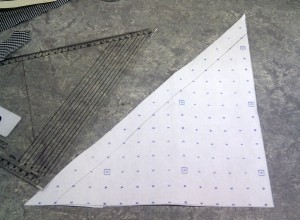
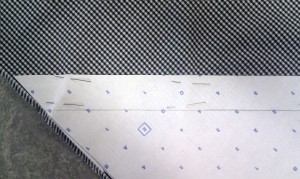
By drawing round a set square, cut a piece of paper with a right angle and 45 degree angle.

Next, draw a line 2.5cm (or as required) in from the 45 degree angle.

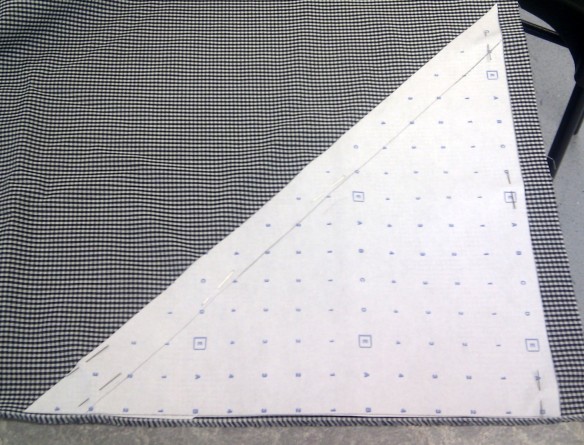
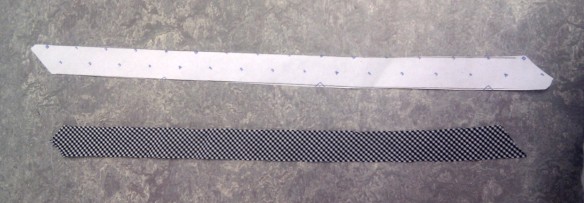
Pin this triangle on to your fabric, using the straight sides to line up with the selvedge. The 45 degree line gives you your bias.

Cut along the inside line drawn at 2.5cm parallel to the 45 degree line, this will create a strip of fabric cut on the bias.

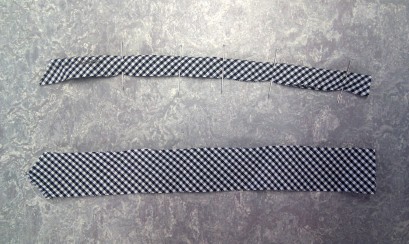
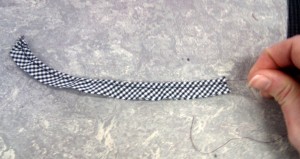
Fold the strip in half lengthways and pin together.

Sew a straight line a few millimeters from the folded edge.

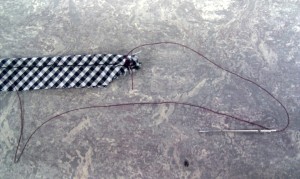
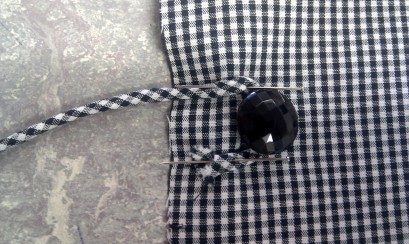
Taking a strong needle and thread, attach the thread to one end of the fabric, next to the opening of the channel you have created. Now for the tricky bit!

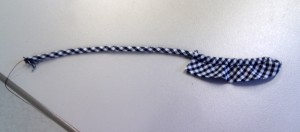
Start threading the needle through the channel, but with the blunt end first to make it easier. Keep going until the needle and thread come out the other end.

The fabric now needs to be turned inside out, with all the excess fabric being captured within the roll. This took me a lot of wriggling and trial and error, but essentially you should be able to pull the thread, which will in turn pull the fabric through from the other end where you have already attached it firmly.

Keep going!

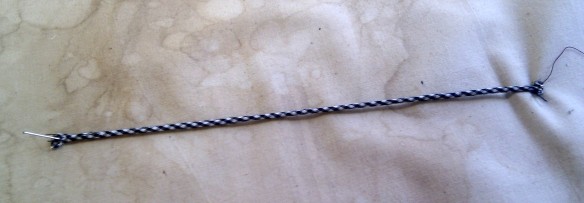
Eventually it will all come through, and it then needs a quick steam from the iron by pinning each end to the ironing board.

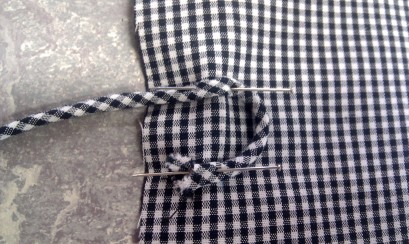
I then used this cord to create the rouleau loops for my buttons, checking the size of the loops against the buttons themselves.

The final rouleau loops on the front of my top!

If none of this makes sense, I found this guide here which may be useful!

Image sources
http://www.bbcgoodfood.com/recipes/5142/mango-and-passion-fruit-roulade
http://blog.tepapa.govt.nz/category/history/fashion-history/
http://designgloss.tumblr.com/ 

Sarah’s Very Sunny Sorbetto

Say hello to Sorbetto No. 3!

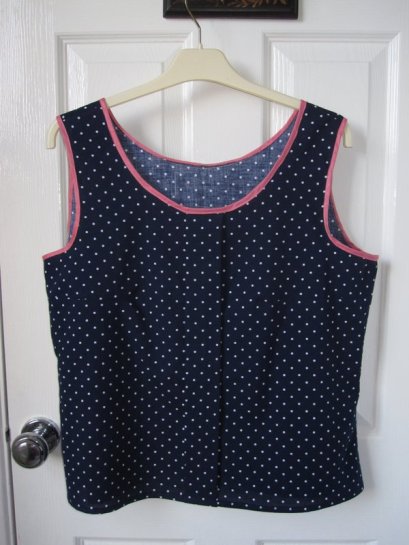
I made this Sorbetto earlier in the year for my friend Sarah’s 30th. As she has pointed out it has become my most travelled make yet – she lives in New Zealand so I posted it to her there, and she has taken some photos of her wearing it in Fiji (look away now if you don’t want to see beautiful sandy beaches, palm trees, general sunny lovliness…)

Doesn’t Fiji look awful? I’m sure she must have had a terrible time. Despite the dull scenery though, I think Sarah and the Sorbetto look great 🙂

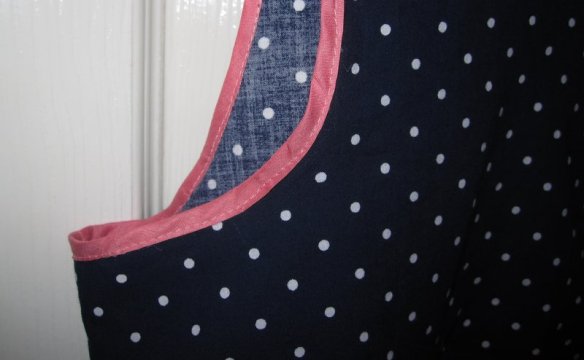
You may recognise the fabric from my Butterick B5217. I bought it to make the Sorbetto and had lots left over for me! I used some pink silky binding to finish off the edges, and while I didn’t quite catch it all as neatly as I would have liked, I think I did a good job considering it’s the thinnest stuff I’ve worked with so far!

I’m also really pleased that it fits. It’s quite hard to check when your customer lives on the other side of the world, but thankfully it seems to be just right!

Some early 80s Style

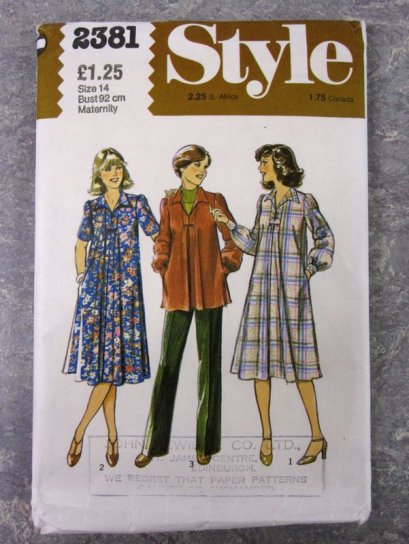
After completing my polka dot top in my clothes making class earlier this week, I needed another top to make for the remainder of the term. I must’ve spent a good hour on the internet wondering what to buy, before I remembered that my mum had given me some maternity patterns she had used when she was pregnant with me. Although possibly a little bit weird, I thought it would be nice to give one a try – enter Style 2381, and some amazing haircuts.

As the stamp on the front of the envelope shows, my mum bought this in Edinburgh which is where I was born. It is quite in keeping with the period – Diana was the trend setter for maternity wear when my mum was pregnant with me.

Oh Lordy. I’m hoping I won’t end up looking quite so tent-like by only making the top rather than the dress, and giving it short sleeves rather than the long ones! Having never done a collar before hopefully I will learn something new along the way as well.

This is the first ‘old’ pattern that I’ve worked with, and I think the markings are much clearer than current ones.

You even get a handy sewing machine foot to show you where to sew!

I’m going to make this top out of a black and white gingham, but to avoid it looking too much like a school dress the check is only a few millimeters big (it is small enough to make you feel like you’re going to fall over if you look at it for too long). It’s from Saheed’s Fabrics on Walthamstow High Street and was £2 a metre.

I think I may be gradually turning in to my mum 🙂

Image sources
http://mikarv.tumblr.com/post/6518008034/lovelydianaprincessofwales-princess-diana

Finished project: Butterick B5217

Yesterday I finished my top in my Clothes Making class, and I think it is the most well made thing I’ve done so far!

I have found this term much less frustrating than last term, as I am now more confident to go and do things on my own rather than have to wait for the tutor each time I get to a new stage.

You can read about the various alterations I made to the pattern before I cut out the fabric here. All was going swimmingly until I tried it on near the end, and realised my bust had grown AGAIN since the first measurements! Luckily, I was able to make the bust area bigger by un-stitching the pleats at the front.

They had been fixed down with top stitching for about 5cm, but by removing these the pleats were free to grow with me.

After the baby comes I WILL return to a more normal size in that area and so can stitch them down again if I want to keep wearing the top.

You may remember that I also added a half circle to the bottom of the front of the top to allow for my tummy to lift it up as it grows. It seems that is already working!

I think I’m most pleased with the sleeves. Having never done sleeves before ‘properly’ it’s amazing to see the difference between me trying to bodge them together, and actually being shown a correct way of doing them. I learnt a better way to gather, did some block fusing, and practiced my sink stitch.

As my classmates kindly pointed out, this top does make me look a bit pregnant. And for once that’s not a bad thing – I can’t believe how much my belly has grown over the last couple of weeks! As the top is made from a lovely light cotton I hope I’ll get lots of use out of it over the summer.

I thought I’d leave you with the view I have of of my feet when I’m wearing this top…


Basic Bodice Block

This term in my Pattern Cutting class we are working on the bodice. From what I’ve been led to believe, this is slightly trickier than skirt patterns that we were working on last term.

So far we have understood where all the measurements for the bodice come from, and then drafted a basic bodice block using a standard size 12.

Hopefully I won’t get in trouble for using these, but I thought it might be useful to see how a basic two-dart bodice comes together from a flat piece of fabric. It helps explain why we have darts where we have darts.

As far as I know, all images are from Basic Pattern Skills for Fashion Design by Jeanne Price and Bernard Zamkoff.

This first image shows a flat piece of fabric wrapped round the body to create a cylinder.

By creating cones of fabric, or darts, above the bust the fabric shapes to the body. These are called the shoulder darts.

The same is done for the waist. These darts are then turned inside and sewn. The flat version above is the pattern for the two-dart bodice. From this basic pattern or block you create different types of top.

I don’t think I’m quite up to explaining how to draft your own block, but if you’re interested then I found a Basic Bodice Block tutorial on the BurdaStyle website that looks quite good!

Pattern Adjustments

At the moment I seem to be following two schools of thought when it comes to clothes making from commercial patterns. However, as I sit here about to start typing I think I may have just come to the realisation that if I combine the two things will become much easier!

The first way I have been doing things is to take my measurements, find the nearest size that corresponds to those measurements on the pattern and then make a toile. From the toile I then have been making the adjustments I need, transferring them back to the pattern and then cutting out the proper fabric.

In my Clothes Making class it is done a bit differently, and no doubt more correctly! From the tight restrictions we have been given, this is the pattern that I have chosen (option D).

Rather than making a toile, we took all our body measurements and then worked directly with the pattern to make any alterations that are needed. This is what I had to do.

Make front larger than back

Unless I am very unfortunate, I am not anticipating my shoulders or back to grow at all while I’m pregnant! Therefore my measurements are a bit skewed as I will stay a size 12 everywhere except around my tummy.

On a commercial pattern you cut out along the line according to your size. Here you can see the four different options:

For everything except the front I cut out a 12. For the front I cut out a 14. If I just left them like this though, the front and back would not fit together as they are two different sizes. To overcome this the extra fabric from the size 14 front needs to be redistributed. As you can see from the picture, the top has pleats and these pleats can be made bigger to use the extra fabric. Lost?! I was for the first few explanations from my tutor!

Maybe some diagrams will help.

Here you can see the uncut front of the top, with the size 14 being the outer line.

The difference in size between the 12 and the 14 is 1.4cm, as shown in blue on the left.

This 1.4cm can be incorporated into the front of the top, by making the pleat bigger. The pleat is the boxy thing in the middle of the pattern piece, and the red lines show where I have made it bigger – 7mm on each side, which adds up to the 1.4cm difference between a 12 and a 14. This will mean that the front (size 14), and back (size 12) will now fit together in construction. I hope.

As additional bump accommodation, I have also made the middle pleat (here shown on the right of the pattern piece) bigger by extending it to the edge of the paper. Shown by the purple lines.

Shorten the top

I also made the top shorter than suggested by removing a section of the pattern using the double black lines on the front and back pattern pieces.
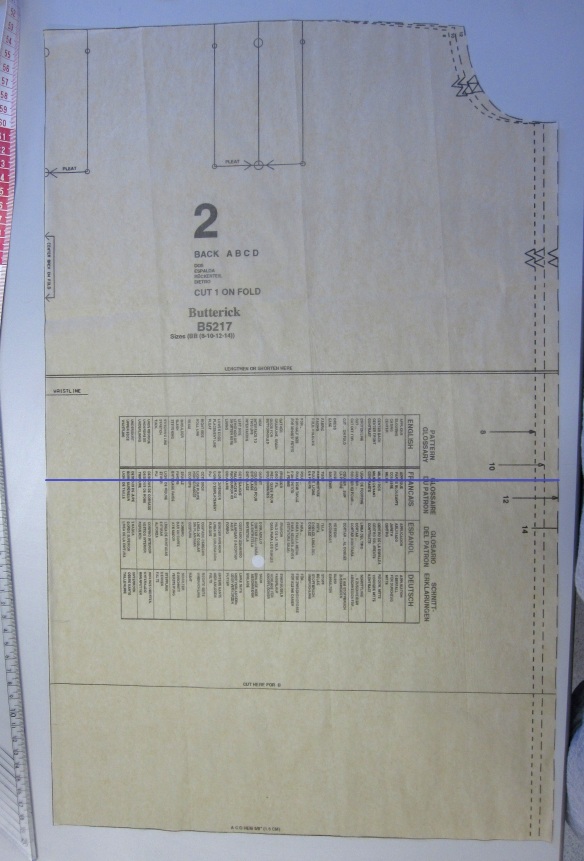
The distance between the double balck lines and purple line is what I need to remove by folding the pattern up.

New shorter top!

Check the shoulders

I then needed to check the shoulder position. Fortunately I didn’t need to adjust this. But I checked like this.

As you can just about make out on the pattern, the neckline is 6.5cm lower than the nape of your neck (nobbly bit at top of your spine). So I measured up 6.5cm from the neckline using the set square, then used a tape measure to measure across to the shoulder. Thankfully it came to 20.5cm which is just about near enough my measurement to be able to leave it as it is!

Bump room

Lastly I added one little extra, a half circle at the bottom of the front, which will mean that as my bump grows the hemline should stay level rather than lifting up!
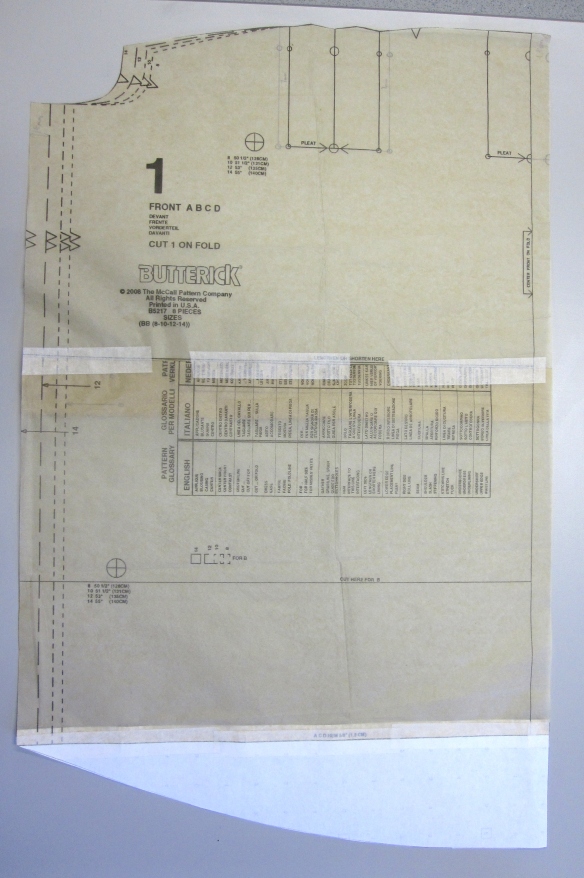
Phew, I hope that made sense!

Back to my initial break through at the start of this post… I’m thinking now that if I start by making alterations to the pattern using my measurements, and then make a toile, and then make further alterations from that, I should have a very long-winded but fail safe way of making clothes that fit me perfectly, no? We shall see!

Back to School: Butterick B5217

This week was the start of the spring term at Morley College where I am doing my sewing classes.

On Mondays I am in the beginners clothes making class. Yes, despite my lack of patience last term with my skirt, I have gone back for more!

This term we are making a simple top, and I have chosen version D of Butterick B5217.

As with the skirt, we were given quite strict guidelines as to what we could choose so that the class isn’t too broad with skill levels.

My normal style would be something much more fitted with bust darts, but as the top will be finished about March time I will have changed shape quite a lot by then. Instead I wanted something that will be comfortable to wear over my bump. I will also be learning about facings and fitting sleeves which I have done on my own before but it will be good to learn how to do it properly.

In the class yesterday we took our individual measurements, and my waist has grown by over 8cm since October! It’s odd getting used to the changes when you’ve had the same familiar body for 30 years. And the rapid growth of my bust over the last 3 months is more alarming than I thought! According to the Butterick size chart I am now a bust size 18, and a rest-of-me size 12. Watch out London – there may not be space for all of us!

This combination of measurements should however mean that I learn quite a lot about altering a pattern to fit me. This will be really useful as it was a problem (not quite so extreme, mind) before I was pregnant anyway.

So, come along for the Butterick B5217 ride. I will be learning a lot, getting frustrated even more, but will hopefully be a happy bunny at the end of it…

Bit of a bodge job

In between bashing out pillowcase dresses for my challenge, I wanted to make something quick to prove to myself that I still have the ability to do other things!

Through reading other sewing blogs I came across Grainline Studio, who seemed to have the perfect answer to my needs. I liked the Scout Woven Tee as it looked nice and quick, was a downloadable pattern so I would have it there and then, was cheap, and I had the ‘perfect’ fabric already. I especially liked the full-back alteration as I would be able to put my pattern cutting skills in to practice.

So I downloaded the pattern and printed out all the pieces to then jigsaw them together.

This had worked OK when doing the Sorbetto, but I was obviously not being as careful this time and things didn’t always line up. I guess this will always be a problem with printing out patterns yourself.

I think I did the Sorbetto on a wooden floor rather than carpet which probably helped. Anyway, this wasn’t even really a problem compared with what was to come!

This is how the sleeves printed out.

In Grainline’s defence, they did send me the amended sleeve pattern, but it was a few days later so I couldn’t really use it. Maybe next time.

The fabric I wanted to use was from an old dress / tent that I was never going to wear again, and not entirely sure why I bought it in the first place!

I also thought I could cut a few corners by making sure I used the existing hemline. I did my pattern alterations, and cut the main part of the top out. So far so good. Then I realised that not only was it going to be impossible to make the bias binding for the neckline, but I also didn’t have enough fabric for the sleeves!

This is where the bodging started. I think I may have committed every sewing sin there is in the process of making this top, so look away now if you are a ‘proper’ sewer and don’t want to see what I did…

I made non-bias binding, which obviously didn’t go round the neck line very well, and in the end wasn’t even long enough. So I added a few tucks here and there round the back where I wouldn’t see them to make it fit.

I cut some sleeve like shapes from the scraps that I had left. Having never drawn / cut / made sleeves before this was mainly just down to guess work. Won’t be doing that again. Then I did a bit of gathering here and there, couldn’t work out how to attach these wonders of modern pattern cutting, stuck a few pins in as best I could, closed my eyes and put my foot down on the sewing machine pedal (kids, don’t try this at home).

The end result isn’t so bad, just a bit tent like. Someone even asked me if I’d lost weight yesterday when I was wearing it (thanks Emma :-)). As I made the larger size to fit in my bust, I probably didn’t need the full-back alteration after all! (This is definitely something I need to work on – grading a pattern so that my bust fits in, but everything else isn’t super big because of it)

This is me

This is a tent

Image source
http://www.belltent.co.uk/index.php?main_page=product_info&products_id=71

Betty’s Blouse

Last weekend I made a trip back down to Sussex for a friends 30th, and popped in to see my nan and grandad while I was there.

Since starting this blog and learning to sew, people seem to have been digging around in their cupboards and giving me all the things they don’t want anymore. This is definitely not a complaint, more an observation – I love getting all these things!

One of the things my nan gave me was a shirt she didn’t wear anymore.

At first glance, this is a shirt I would never wear – not only was it a good few sizes too big (not sure why as my nan is much smaller than me now 🙂 ), but it also had shoulder pads and just wasn’t very ‘me’.

The fabric however was nice, and only a few days before a friend had sent a link to a shirt refashioning tutorial on another blog. So guess what I did?

I unpicked the sleeves and collar, turned the shirt around, took it in at the sides, added a couple of new darts and a new neckline, and had a new top!

!!!PILLOWCASE DRESS UPDATE!!!

We’re over half way!

Aside from making Big-Dinner-Trousers and reversed shirt tops from my nan, I have also managed to make eight pillowcase dresses this week. I am keeping them plain from now on as I have three pillowcase dress parties coming up over the next few weeks where people will be able to make them as pretty as they like!

The grand total of dresses is now 28 – only 24 to go and I have a pile of nearly 20 pillowcases waiting for me in the spare room!

Pillowcase Dress 21

Pillowcase Dress 22

Pillowcase Dress 23

Pillowcase Dress 24

Pillowcase Dress 25

Pillowcase Dress 26

Pillowcase Dress 27

Pillowcase Dress 28

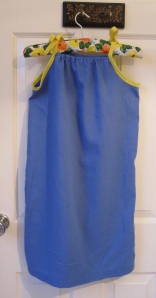
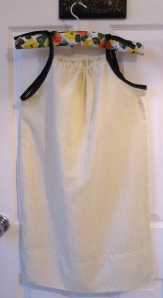
You can see these dresses and the others in the Pillowcase Dress Gallery, or have a look at my Pillowcase Dress Challenge page to find out how you can get involved!