47 days left to make a dress!

I have been debating over the last few weeks whether to show you the dress I am currently making, as it is to wear for my 30th birthday on New Years Eve. Not only was I thinking of making it a surprise on the day, I’m also conscious that I may have shot myself in the foot if I don’t pull it off / make it in time! But I’ve decided to show you anyway and hope for the best!

As its a special birthday, and everywhere I go now people ask me if I made what I’m wearing (I guess that’s either a compliment, or I just generally look a bit handmade), I wanted to try and make a dress for my birthday celebrations.

I knew I wanted a vintage style, but don’t feel ready to tackle a real vintage pattern yet. Instead, many of the big pattern producers have reissued patterns from the past but with updated instructions. I started by looking at Vintage Vogue patterns like these ones as I know that the shape suits me.

However, I then remembered a pattern I bought a couple of years ago. After buying it I realised I didn’t really know how to tackle it so it was put on a shelf and forgotten. Until now!

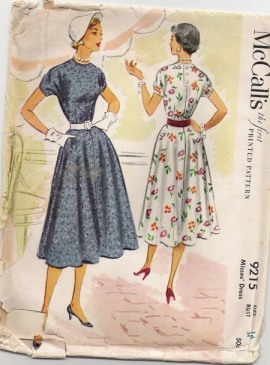
The pattern is Simplicity 3673. Rather than the full skirt I thought I wanted, I am going to make version A on the right.

This pattern is a reissue of Simplicity 1734. Again, mine is the one on the right.

Although in the images the dress looks like it could be for work, I think the fabric and buckle that I have bought will make it look suitably dressy. I will keep them as a surprise though!

So far I have made the muslin. After my experience making trousers I know how important this stage is. I was especially thankful when doing this one as I made a couple of mistakes along the way that I won’t do on the real thing.

As you can see it is quite large! Although I had been warned that Simplicity sizes come up big, I made the size that tallied with my measurements as my bust is rather ample and I wanted it to fit in! It also isn’t closed at the back which doesn’t help, and I had originally made it without the seam down the front. I forgot to take out the seam allowance when doing this though, so for this exercise it has stayed.

Holding the back, this is how it will hopefully fit in the end when I have done the alterations.

Much better.

Now I’m pretty certain you are all on the edge of your seats wanting to see the finished dress – only 47 days to wait!

Image Sources
http://www.blogforbettersewing.com/2009_06_01_archive.html
http://www.jaycotts.co.uk

The Magic Dress

On my way back from College yesterday I saw this poster by French Connection:

It set my imagination off thinking about what I would like from a Magic Dress, and did I already own one?

Having watched the short film that comes with the ad campaign, I now know that I definitely do not own a Magic Dress in the French Connection sense of the word.


None of my dresses enable me to shoot flames from my hands, multiply myself into many more me’s, or make glitter fall from my armpits when I do archery.

Despite being a little disappointed at my now frankly quite dull dresses, I started thinking about what made makes my dresses magic to me, and which one is the most magic of all. At first I thought about the really dressy ones that I can only wear on special occasions, like the red one I showed you in a past post. Some of them do make me feel fantastic and transport me to another era, but I still wouldn’t say they are magic.

Then I thought of the dress that I always turn to when I:

a) Want to feel pretty
b) Want to feel like I’ve made a bit of an effort, but without having to do too much
c) Want to be reminded of happy things that have happened
d) Need cheering up
e) Want to be comfortable

I think the dress that helps me do all of those things is my Magic Dress!

I also thought it would be the perfect dress to show you as I was sure there were already lots of photos of me wearing it. However, having trawled though a couple of years of photos, I do indeed wear it alot but there are very few photos of the whole thing!

There are plenty of me wearing it whilst eating…

And drinking…

And this one is particularly helpful…

Here is the dress on a hanger. It isn’t ideal I know (I am crossing everything that Father Christmas / the 30th Birthday Fairy brings me a mannequin this year. Is that a big enough hint? :-)), but then I will show you some details.

Dave bought me this dress from a vintage stand on Brick Lane a few years ago. The fabric caught my eye first of all, and I am rubbish at hiding when I like something so the stall holder knew she was on to a winner, and Dave knew he was on to a loser! The seller ‘forced’ me to try it on, and of course after that there was no going back. I love it not only for the way it makes me feel, but also obviously because of its design and fabric.

I think the collar and neckline are quite unusual, and I love the huge patch pockets.

The seller suggested it was probably a 1960s dress, and these types of pockets were definitely popular then as these patterns show.

This is the label inside, but I haven’t been able to find anything out about the company other than there are quite a few DL Barron things being sold on the internet, all from the 1960s and 1970s.

As it’s a summer dress I will have to wait a while to wear it again, but it is definitely my feel-good dress for all occasions! I would love to hear if you have a Magic Dress?

Image sources
A lovely holiday in Italy, boy do I want some gelato right now…
http://www.cemetarian.com/shopping/pgm-more_information.php?id=3189&=SID

Grainlines

I hope you are all sitting comfortably today, and are ready to concentrate as I think I may be about to confuse us all!!

I am going to attempt to explain grainlines after being taught about them in my Pattern Cutting class a few weeks ago. I honestly do think I understand them in practice, but trying to explain them to you in an easy to understand way might be a bit beyond me (those that are far more knowledgeable on such matters feel free to point out any errors). Here goes though!

I drew a little diagram in a past post, which shows the main things to understand about the construction of fabric. Here is a more professional one as a reminder:

On a pattern the grainline is shown by a straight line with an arrow at each end. Here they are the lengthwise grain, the crosswise grain and the bias grain.

These straight lines should always be parallel to the selvedge edge when laying out pattern pieces. This is done by using a ruler to ensure each end of the grainline is the same distance from the selvedge / selvage.

I am going to tackle each of the grainlines individually to try and explain them a bit more in regards to skirts. Essentially, the grainline that is used affects the way that the skirt will hang.

Lengthwise / Straight grain

This image shows the front of a skirt. It is cut using the straight grain through the centre front / middle. The lines indicate this grainline, and the red line with arrows shows what would appear on your pattern.

By cutting the fabric this way, along the warp, the skirt will hang straight and the sides will go out.

Bias Grain

The bias grain is 45 degrees to the original grainline. It means the fabric will hang in a softer way, and pull to the body. This grainline has the most stretch and give.

You can also achieve interesting results using the bias grain on patterned fabrics. Imagine this was a checked or striped fabric on the front of a skirt.

Gore Grain

The final grainline we were taught about was the gore grain. This grainline can be used if the skirt is made of four pieces, and the grainline is put through the middle of the leg.

It was a popular grainline in the 1940s as it didn’t waste as much fabric as using the bias grain, but was much more flattering than using the straight grain which can look a bit like a triangle!

McCalls 9215

It is created by marking the centre point between the centre front and side of the pattern piece, and the centre point on the hem. You then join these two points with a straight line and this is the gore grain.

You can also create a bias gore grainline which is 45 degrees to the gore grainline.

I found this diagram helpful in summing everything up.

Now, once you have got your head round all of that and done your hair, you are ready to place your patterns and get cutting 🙂

Image sources
Singer Sewing Book, 1969
Basic Pattern Skills for Fashion Design, Bernard Zamkoff and Jeanne Price
http://www.dressaday.com/2007/09/could-this-be-the-one.html
http://3hourspast.blogspot.com/2011_05_01_archive.html

For the Perfect Skirt Line, at the Height of Fashion

Have you ever found the perfect skirt or dress, only to realise the hem line is just that little bit too long?

Or have you ever been making a dress at home on your own, wishing there was someone else to help you mark the perfect hem length?

Then help is at hand – you need the Milwards Skirt Level!

This intriguing device came to me from my Nan on the same day she gave me the shirt that I recycled in to a top.

So how does it work? If you turn the box over there are very clear instructions to help you on your quest for the perfect hem line.

Opening the box this is what you find.

To me this looks more like something you find inside a toilet cistern, but undeterred I took it out of the box and gave it a try.

Firstly you check there is chalk in the black and white thing-a-ma-jig. Then stick it to a suitable surface at the desired hem line height, using the suction pad.

Next, you get up as close as you can to the nozzle, and squeeze!! As you squeeze you move yourself round, gradually marking a line of chalk on your skirt where the new hem line should be.

(Please excuse my very creased skirt - it was awfully early when we took these pictures and I wasn't about to crack out the iron!)

I need never have a wonky hem again!


The Help

While on holiday back in June I read a book called The Help, about an American town in 1960s Mississippi. The book tells the story of black African-American maids who care for the children and clean the houses of white people, and also the perspective of a white girl who see’s that things need to change.

The Help was made in to a film, and released here in the UK in October – so off I went to go and see it. While the book delves a bit deeper in to the issues of the time, I did really enjoy the film. However, this is not a film review blog it is a sewing blog, so I am going to run away from the self-inflicted pressure I’m feeling to give a detailed account of the pro’s and con’s of the film, and show you some pretty pictures instead…

As well as the big, no HUGE, hairstyles, I wanted to show you some of the costumes as I thought they were amazing!

I really like the gathered neck and brooch on Aibileen's dress

If only I could pull off wearing glasses like that!

Aibileen's got pintuck's on her uniform - I know how to do them!

Blimey! If you can tear your eyes away from that hair, the scalloped detail on her dress is lovely!

Images sources
http://elblogdepmcg.blogspot.com/2011/08/movie-review-help.html
http://trendingceleb.blogspot.com/2011/07/emma-stone-and-jessica-chastain.html
http://welcometothemiddleoflife.wordpress.com/2011/08/17/the-help-the-movie-a-review-of-sorts/

Challenge Beating Pillowcase Dress Party #2: Haywards Heath, Sussex

WE’VE BEATEN THE CHALLENGE!!

On Saturday my Mum held Pillowcase Dress Party No. 2 down in Sussex where I grew up. The hard work of the Haywards Heath Methodist Church ladies has meant that we have SMASHED (Dave has been making me watch X Factor, can you tell? And yes, it is definitely him making me watch it, not the other way round) the target of 52 dresses. We’ve reached 52 dresses 48 days before the Christmas deadline!

The kind contributions from Saturday also mean that if I can make them all in time we will by far exceed the target! I’m so glad I travelled down to meet you all, and am very thankful for all the support / work / donations you all made.

As with Pillowcase Dress Party No.1 there was a table of wonderfull-ness. Everyone had dug around at home to see what trimmings and buttons they had which could be used on the dresses.

The ladies then set up a production line, with some cutting, pinning and ironing. Others attached the binding, and then Mum and I were on the sewing machines!

The most important job of the day!

Here are the amazing stats of the day:

18 Dresses completed. They can be seen in the Gallery, but I’m still waiting for photos of some of them.
32 Dresses half made
10 Pillowcases unused
18 people came along to help

That’s not the end of the success story either. In the afternoon Jennie Herring came along to say hello. Jennie and her husband run the Nyaboo Ghana Development Fund in Ghana, and they are making a trip out there next week. Jennie has taken nearly 50 of the dresses we have made, and will be distributing them when she gets out there!

Jennie with the dresses

I will tell you a bit more about what Jennie and Graham do when I have photos of the girls wearing the dresses, but in the meantime if you would like to find out more their website is http://www.ghanaaction.org.uk (although I haven’t actually been able to make it work today). In a nutshell, they are working with the Nyaboo community to improve the local school, football team, sanitation and water supplies.

Everyone seemed to enjoy the day, and I think we can safely say it was a great success – thank you everyone! An extra special thank you to my Mum as well for organising the day.

I also think I am going to officially up the target to 100 dresses by Christmas! (If anyone wants to take any of the 40+ half made dresses I have off my hands between now and then – be my guest! I will happily pass some on to you if you leave a comment on this post – I am starting to dream about drowning in pillowcases :-))

Five years? FIVE YEARS?!!

Dave and I have been married for five years today! Happy anniversary Dave x

Rather than gush about married life I thought I would show you three generations of wedding dresses in my family – mine, my Mum’s and my Nan’s.

Now, they are both a little bit shy about me using their photographs so please be nice and don’t use them anywhere else (not sure why you would, but wanted to say it to set their minds at ease).

This is Dave and I five years ago.

We got married down in Sussex where we grew up, and it was a crisp blue winter’s day – lovely. I chose my dress because it was quite simple, just a plain white dress with an overlayer of chiffon, no meringues here! It was a pretend two piece, with buttons up the back. Instead of sparkles on the dress I went for sparkly jewelry.

Five years ago I don’t think I had really developed my own taste in clothes, and especially didn’t have such an interest in vintage clothes. If I was to choose a wedding dress now I think it would be quite different. I still felt very special in the one I did have though!

My Mum and Dad got married in 1980, and my Nan made her wedding dress. Doesn’t she look pretty!

Luckily Mum got married before Diana and her huge dress, otherwise my Nan could have been faced with quite a challenge! Although shoulderless dresses weren’t the fashion then, there are definitely similarities between mine and my Mums dresses. Both nice and simple.

When I went home the other day I tried Mum’s dress on and it was a perfect fit!

Wedding dresses in the late 1970s and 1980 moved on from the narrow, high-waisted empire line of the late 1960s to the more flared princess line. There was often little or no train, and the waist gradually fell to its natural position by 1980.

Princess Anne influenced brides in the 1970s with her fitted gown and extravagant sleeves.

Batwing sleeves also became popular, which is what my Mum had – as you can see from my expertly modeled pose!

My Nan and Grandad got married in 1949.

She too has a relatively plain and simple dress, but with the biggest veil of the three of us. And the flowers are huge!

1940s wedding dresses can be split in to two halves, during and after the war. During the war rationing restricted what could be made, and after the war longer dresses that used more fabric could be made. My Great Aunt got married a few years before my Nan, and wore a day outfit to her wedding due to scarce supplies.

The sweetheart neckline, wide shoulders and mutton sleeves were the predominant style of the 1940s. All of which my Nan had in her dress. She was telling me that her dress was actually made as a bridesmaids dress for a wedding she went to earlier in the year. As it was white, and things were still a bit scarce, she then wore it as her wedding dress as well.

It is also easy to see the influence that Queen Elizabeth’s dress had when she got married in 1947. It has the same neckline and silhouette as my Nan’s, and a long veil.

Royal wedding dress picture: Queen Elizabeth II, who married at Westminster Abbey, as will Prince William and Kate Middleton

So that’s it – three generations of my family (and some of the Royal family!) and their wedding dresses. Thank you Mum and Nana for letting me use your photos – I am a very lucky girl to have you both.

Image & Info sources
http://www.dressfinder.com/history-wedding-dresses/
http://www.thisislondon.co.uk/standard-pictures/Comparing+the+Royal+gowns+of+the+past-latest.do?id=23381473&page=3
http://news.nationalgeographic.com/news/2011/04/pictures/110428-royal-wedding-dress-kate-middleton-prince-william-gown-designed/
http://buyvintageweddingdress.com
http://mylusciouslife.com/StyleLeader/Knowyourfashionhistory.aspx 

Japanese Sketchbook

I haven’t really given much of an update on the Japan project I am doing in my Fashion Design class, mainly because I have just been cutting and sticking for a few weeks.

I have a few completed pages of research to show you now from my sketchbook. They are helping me to decide what colour palette to use for my capsule collection, the types of fabric I might use, and the shapes and structures of the clothes.

The next stage will be a moodboard, and then designing I think! I want the collection to be something I would actually wear, rather than a crazy origami-like creation.

This slideshow requires JavaScript.

Check out my IT skills – I put in a slideshow! Now, if only I could work out how I did it…


Pillowcase Dress Party #1: Mindshare, London

Forget the Christmas party season, last night started Pillowcase Dress Party Season!

Dave works at Mindshare in London, and after he sent round an email about my challenge, some of the Mindshare girls were keen to have a dress making party. Sarah organised the people and the necessities:

And I had the oh-so-tough task of buying the bits and pieces and sparkly things for the dresses. I went nuts on Walthamstow Market!

Now let me set the scene. Mindshare have just moved to uber swanky new offices near Tottenham Court Road, and this is the view of the London skyline that we were faced with whilst sewing:

We had an amazing (if a little dark as no-one could work the lights!) space in which we set up three sewing machines and then tables at which people could cut out and sew at.

I gave a little intro to making the dresses, and then off everyone went to make their own.

Here are some snaps from throughout the night.

I wore my Clover trousers – regular readers will remember how much pain and anguish these trousers caused me, but after a week of no contact we were back on speaking terms and I made a few more alterations to make them fit better. Now I love them!

Mindshare have their own branded water bottles - how posh is that!

Those that didn’t want to use machines decorated dresses that I had already made. This is what we’ll be doing at the Drink, Shop & Do party on 6th December so come along and help out then if you’d like!

This dress was a joint effort as it was the one that Dave made, which then got decorated last night (after we explained that it would all be OK, and his dress wouldn’t be ruined).

Rather than put even more photos here, I have added all the completed dress photos to the Pillowcase Dress Gallery, with the picture of who made them as well.

I had an amzing night, and am so grateful for all the help and support the Mindshare girls gave me – especially as they’d never met me before! I brought home 10 new dresses, and a few more are just being finished off before they’re handed over.

That brings the new total of dresses to 40 – only 12 to go to complete the challenge! I am thinking I might have to up the challenge to 100 dresses by Christmas instead…

Thanks for a great evening girls x

Back to School – skirt pockets

Yesterday was back to school after half term, and back to my clothes making class.

Some of you may remember my last, rather frustrated, post about the skirt I am making in this class. Well it got lots better yesterday as I actually started making the skirt!

I began with the pockets. Here I have pinned the lining of the pockets to the right side of the front of the skirt.

After stitching this together, I learnt how to do a seam that makes a nice finish round the curve of the pocket. It means that I don’t have to top stitch. Annoyingly I didn’t write down what it was called, but it may just be a flat stitched seam?

After sewing the pieces together leaving the correct seam allowance, turn over to the right side, and place the fabric under the machine foot as close to the edge of the pocket lining as possible. Sew along here, using your fingers to keep the two pieces taught.

Turn back to the wrong side, and cut off the excess seam allowance close to the line of stitching you have just done.

Now the seam needs pressing. I am having a bit of trouble with my fabric as it marks really easily when using the iron (hopefully it won’t be too noticable when the skirt is finished), so to stop this from happening I steamed the seam rather than put any real weight from the iron on it.

A handy trick I was taught to keep the seam in place when pressing, was to pin each end of the seam to the ironing board.

 The seam I have created made the fabric then naturally roll over to create a nice finish.

Apologies for all the photos but I was really chuffed at how these pockets have turned out, so wanted to make sure I record how I did it properly! It is also taking me ages to write this post as Peggy keeps chasing the mouse cursor across the screen…

I then joined the second part of the pocket to the pocket lining by pining and straight stitching.

The excitement of the class didn’t stop there folks – I then used the overlocker! In past posts from this class I have shown a number of different seam finishes you can do on a domestic sewing machine. As we have the opportunity to use an overlocker in the classroom I thought I would use that on this skirt as it is what is used in industry. An overlocker looks quite an intimidating machine – especially this one which is a bit prehistoric.

It gives a great finish though, and once you’ve used it a couple of times its not so scary. The overlocker not only ‘locks’ the raw edge of the fabric with stitches, it also cuts away excess fabric as it goes.

Finished seams of pocket

Next on the skirt construction I joined the two sides together using a long basting stitch, so that I could check it would go over my hips before I finished the seams off properly. Not only did the skirt go over my hips, it went over my hips in jeans 🙂

!!!PILLOWCASE DRESS UPDATE!!!

Just a quick one, but I’ve got my first pillowcase dress party tonight at Dave’s work – I think over 20 people are coming, eeeeek! Wish me luck, and that we make lots of lovely dresses!